
Bathroom waterproofing is the hidden layer behind your tile, and it decides whether your shower lasts five years or twenty five. You never see it. Once the tile goes up, that layer sits sealed inside the wall for good. Most homeowners spend weeks choosing tile, grout color, and fixtures, then approve the one part of the job that keeps water out of the house in about thirty seconds.
This guide covers what that layer is, how the four common systems work, where bathrooms actually leak, and how to confirm the work was done right before tile hides everything.
Bathroom waterproofing is a continuous barrier installed over the substrate before any tile goes up. Tile and grout are not waterproof on their own. The membrane, whether liquid, sheet, foam board, or a traditional pan liner, keeps water out of framing, subfloor, and wall cavities.
Why Tile and Grout Are Not Waterproof
Grout soaks up water. Cement grout is porous by design, so moisture passes through the joints every time someone showers. The tile sheds water well. The thin lines between each piece do not.
That surprises most people. A finished shower looks sealed, so it feels sealed. What really happens is simpler: water gets in, and something behind the tile has to handle it. Either a membrane blocks that water and sends it to the drain, or the water keeps traveling into wood framing and subfloor.
Sealing grout does not change this. Grout sealer slows staining and makes cleaning easier. It never turns a shower into a watertight box. If a contractor answers your waterproofing question by talking about sealing grout, ask a follow up question.
The Tile Council of North America publishes the installation methods most professional tile setters follow in the United States. Their guidance for wet areas is direct: a membrane belongs behind tile in a shower. It is part of the assembly, not an upgrade.
The Four Bathroom Waterproofing Systems Explained
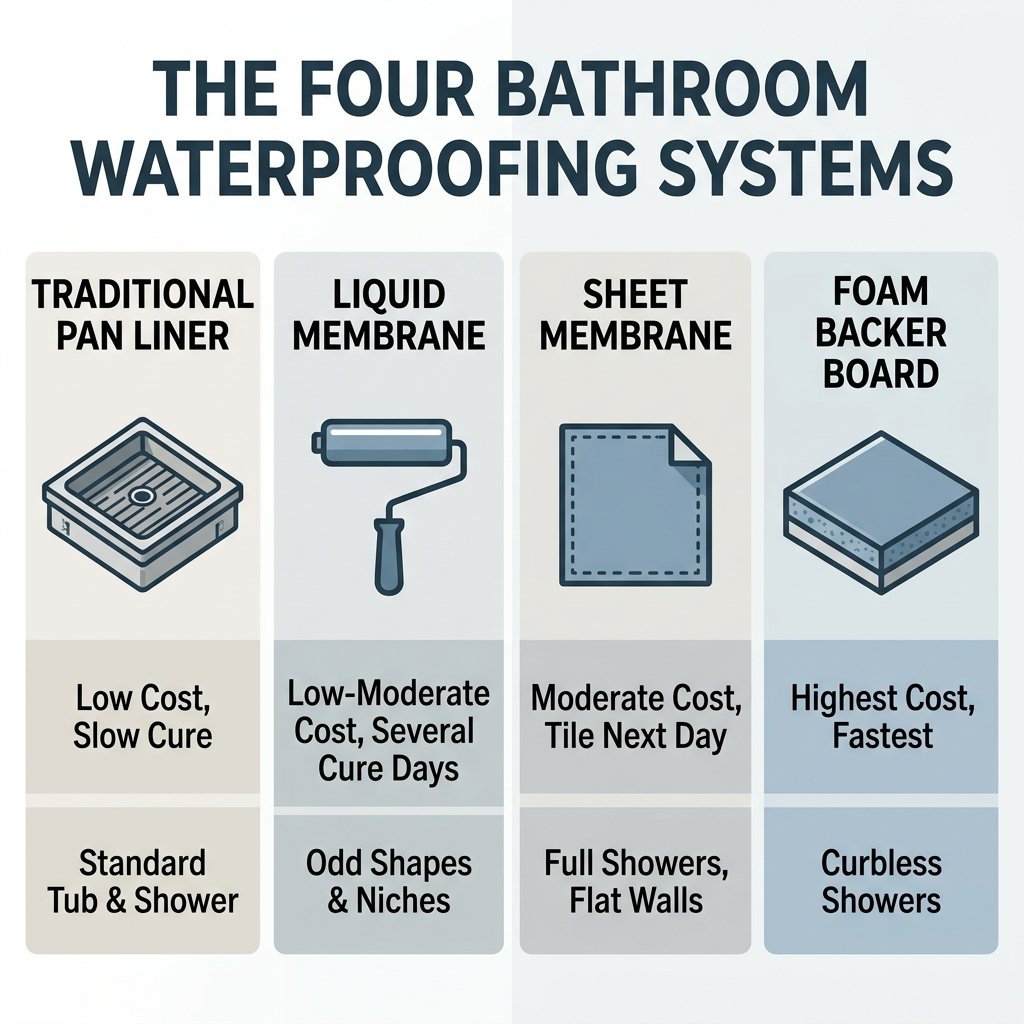
Four systems cover nearly every bathroom waterproofing job in American homes. All four work. They differ in cost, speed, and how much they depend on careful hands.
| System | Material cost | Speed | Best fit |
| Traditional pan liner | Low | Slow, long cure times | Standard tub and shower alcoves |
| Liquid membrane | Low to moderate | Slow, several cure days | Odd shapes, niches, curves |
| Sheet membrane | Moderate | Fast, tile the next day | Full showers, flat walls |
| Foam backer board | Highest | Fastest | Curbless showers, tight schedules |
Traditional Water In, Water Out
This is the oldest method still in daily use. Builders staple tar paper or plastic sheeting to the studs, then screw cement board over it. On the floor, a flexible liner sits inside a sloped mortar bed and clamps into the drain body. Small weep holes in the drain let trapped water escape.
The logic is honest. Water enters the mortar bed, then drains away instead of pooling. Built properly, these showers last decades. Many of them still perform fine in Peninsula homes from the 1960s.
Trouble starts with anything unusual. Benches, niches, and flat shelves inside the shower all hold water. A liner buried under mortar cannot protect those surfaces.
Liquid Applied Membranes
Liquid membranes roll on like thick paint over cement board. Two coats create a rubbery skin bonded directly to the surface, and tile sticks straight to that skin.
Thickness decides everything here. These products only perform at the dry film thickness the manufacturer specifies, usually around 30 mils after two coats. Color tells you nothing. A wall can look fully coated and still sit far too thin. Careful installers check with a wet film gauge, a small metal comb that costs under ten dollars, rather than guessing.
Cure time is the trade off. Each coat needs a full day. The second coat goes on crossways to the first, which covers any thin spots. Add a mortar base that needs three days to cure, plus a day of testing, and one small shower can hold a schedule for most of a week.
Products certified to the ANSI A118.10 standard for bonded waterproof membranes have been tested for exactly this use. Standards published through the American National Standards Institute give you a real benchmark instead of marketing claims.
Bonded Sheet Membranes
Sheet membranes are thin fabric backed plastic sheets pressed into a bed of mortar on the wall. Thickness never varies, because the factory already set it. Tile can go on the next day.
Seams carry the risk. Sheets overlap by about two inches, or the installer covers each joint with a separate band of the same material. Corners get folded pieces or preformed parts, which stack up and stand slightly proud of the flat wall.
One detail outweighs the rest with these systems. Sheet membranes need unmodified mortar. Modified mortar traps moisture between the plastic and the wall, and the bond eventually lets go. Manufacturers such as Schluter Systems publish this requirement in their installation handbooks, and warranty coverage depends on it.
Waterproof Foam Backer Board
Foam panels skip the membrane step. The board itself is waterproof through its full thickness. Installers screw the panels to the studs, seal every joint and screw head with a waterproof sealant, and the walls are ready for tile.
Speed is the main draw. Nothing to roll, no drying day, no sheet to smooth out. Many manufacturers also make matching sloped shower bases, which makes curbless showers far easier to build.
Cost runs higher than cement board, sometimes much higher on a large shower. Foam also flexes more than cement board, so panels need solid support behind them. Tile does not forgive movement.
Which System Is Actually Best
None of them, and all of them. That sounds like a dodge, so here is the reasoning.
Each of these four systems has kept showers dry for decades. Each has also failed within two years. What separates those outcomes is almost never the brand on the bucket. Failures trace back to a corner that got one thin coat, a drain that never got sealed properly, or a crew that tiled a day early because the schedule slipped.
Choose the system that suits your shower design and your contractor’s real experience. A crew that has installed the same sheet system hundreds of times will deliver a better result than the same crew trying foam for the first time. Ask which one they use most, and why.
Where Bathrooms Leak
Leaks rarely start in the middle of a wall. They start where two surfaces meet, where a pipe passes through, or where water sits instead of draining.
The Shower Pan and Drain
Most residential shower failures begin at the floor. The base needs a slope of at least 1/4 inch per foot toward the drain. Anything flatter lets water stand, and standing water eventually finds a path through.
Drain connections deserve equal care. The drain flange is a hole punched straight through your waterproof layer. Whatever membrane you use has to bond, clamp, or seal into that flange so the barrier stays continuous from wall to drain.
Corners, Seams, and Changes of Plane
Corners move. Framing shifts slightly with seasons and humidity, and all of that movement concentrates where two planes meet.
Reinforcing fabric or mesh belongs in those corners. Some liquid products list reinforcement as optional. In my opinion, based on how often corner separations turn up during demolition, a strip of fabric costs almost nothing and removes a real risk. Seams between boards should also be taped and coated before any membrane goes on.
The Curb and Threshold
Water hits the curb during every shower. The membrane needs to wrap over the top of the curb and continue at least two inches down the outside face. An uncovered curb pulls moisture into the framing below it, and that damage shows up as a soft spot in the bathroom floor long before anyone suspects the shower.
Niches, Benches, and Valve Openings
A niche is a flat shelf inside your wet zone. Water sits there. Shampoo bottles sit there. That surface needs the same protection as the floor, plus a properly sealed front edge using backer rod and silicone rather than grout alone.
Valve and pipe openings need dedicated seals or a careful buildup of membrane in thin layers. Both spots are small, and both cause large repairs.
What Needs Waterproofing Outside the Shower
Bathroom waterproofing covers more than the shower, and this part gets skipped constantly.
- The bathroom floor: The strip where the shower base meets the bathroom floor takes a splash and drips every day. Extending the membrane a few inches past the threshold protects that transition. Homes with children, or a heavily used family bath, benefit from waterproofing the full floor.
- Tub surrounds: The gap between the tub lip and the wall board is a known weak point. Water runs down the tile face, reaches that gap, and drips into the wall unless the membrane carries down over the tub flange.
- The toilet flange: A worn wax ring leaks slowly and quietly under the toilet base. This is plumbing rather than membrane work, but it belongs on the same checklist because the damage looks identical.
- Vanity walls and laundry closets: Splash zones behind a sink need moisture resistant backing at minimum. When a laundry closet shares a wall with the bathroom, that shared wall deserves attention too.
Full wet room treatment, where the entire bathroom becomes one sealed surface, suits curbless designs and accessible layouts. For a standard hall bath, it is usually more than the space needed.
What California Code and San Mateo County Inspectors Look For
Waterproofing is a code matter in California, not a preference. The California Building Code requires moisture resistant backing behind tile in tub and shower areas, and standard gypsum board does not qualify. Current code documents are published by the California Building Standards Commission.
Timing matters as much as materials. Inspections happen at set stages, and the waterproofing inspection comes before tile. Once tile covers the wall, an inspector cannot verify anything, and neither can you. Solid contractors plan around that inspection instead of working past it.
Permitted bathroom work in San Mateo County involves separate building, plumbing, and electrical approvals, each with its own visit. Unpermitted bathroom work has a way of surfacing during a resale inspection years later, usually at the worst possible time. Our team pulls every San Mateo County permit and meets each inspector as part of our shower remodeling projects.
Waterproofing in Older Redwood City and Peninsula Homes
Slab Foundations Change the Approach
Redwood City housing stock leans older, and many homes built before 1970 sit on concrete slab. That single fact reshapes a shower project. Moving a drain means cutting and repouring concrete. Curbless designs get harder, because there are no floor joists to recess for the sloped base.
Sloped foam bases and bonded systems often solve this better than a traditional mortar bed, since they add less height above the slab.
What Is Usually Behind a 1960s Bathroom Wall
Demolition day tells the truth. Bathrooms from that era typically have a hot mop tar pan, a mud bed over wire mesh, tar paper behind the walls, or occasionally nothing at all. Plenty of those assemblies still hold. Others have been quietly wet for years.
Original bath fans from that period were undersized when new, which adds humidity load on top of everything else.
Signs the Old Waterproofing Already Failed
- Tile that sounds hollow when you tap it
- A musty smell that returns no matter how much you clean
- Stains on the ceiling of the room below
- A soft or spongy spot at the shower threshold
- White chalky deposits along grout lines
Any one of these calls for opening the wall to look. Waiting makes the repair larger. Situations like these often become a full bathroom remodel once the extent of the moisture becomes clear.
The Flood Test: The Only Real Proof It Works
A flood test proves your waterproofing holds, and it takes one day.
The installer plugs the drain with an expandable test plug, fills the base with one to two inches of water above the drain, and marks the water line. Everyone walks away for 24 hours. The next day, that mark tells the whole story. Water at the same level means the pan holds. Any drop means water is escaping, and the drain connection and curb corners are the first places to check.
Run this test before the tile. Finding a leak with a bucket of water costs an afternoon. Finding the same leak after tile, glass, and fixtures are installed costs thousands.
Mistakes That Cause Most Waterproofing Failures
- The membrane applied was too thin. Coverage that looks complete can still fall short of required thickness. Two full coats are on the floor, not the ceiling.
- Wrong mortar with a sheet system. Modified mortar under sheet membrane leads to bond failure. Manufacturers specify unmodified for a reason.
- Tiling before full cure. Dry to the touch and fully cured are different states. Follow the printed schedule.
- Corners and seams are treated like flat walls. These spots need extra material every time.
- Not enough slope on the base. Below 1/4 inch per foot, water stands.
- Mixing two manufacturers’ systems. Combining brands usually voids both warranties and leaves nobody responsible when something fails.
- Applying over a damp or dusty surface. Bond strength depends on clean, dry backing.
- Skipping the flood test. The cheapest verification available, and the most commonly cut.
How to Tell If Your Contractor Is Waterproofing Correctly
You do not need trade knowledge to ask good questions. Four of them separate a solid answer from a vague one.
Which waterproofing system will you use in my shower, and why that one? A clear, specific answer means the crew has a method. General reassurance means the opposite.
Will you flood test the pan before tile? Yes is the only good answer. Ask how long the test runs.
When is the waterproofing inspection scheduled? This confirms the work is permitted and that tile will wait for approval.
Can I get photos before the tile goes on? Reasonable request, easy to fulfill. Photos of finished corners, the drain connection, and the curb give you a permanent record of what sits inside your wall.
One more piece of advice: go look at yourself. Stand in the shower before tile day. Check that corners appear built up rather than thin, that the curb is covered on top and outside, and that the membrane runs into the drain rather than stopping near it. Our remodeling process includes daily progress photos for exactly this reason.
Bathroom Waterproofing Frequently Asked Questions
Do you need to waterproof behind the shower tile?
Yes. Grout and tile both let moisture pass into the layer beneath. Without a membrane, that water reaches the framing and subfloor, which leads to mold and rot. A continuous barrier behind tile is standard practice and part of code compliant construction in wet areas.
Is cement board waterproof?
No. Cement board resists water damage and stays stable when wet, but water passes through it. Manufacturers state this in their own instructions. Cement board needs either a membrane bonded to its face or a moisture barrier installed behind it before tile.
Is shower waterproofing required by code?
Yes in California. The California Building Code requires moisture resistant backing behind tile in tub and shower areas, and inspectors check this before tile goes up. Regular gypsum board does not meet the requirement.
Liquid membrane or sheet membrane, which is better?
Both perform well when installed correctly. Liquid membranes handle curves, niches, and odd shapes without seams, though they depend on correct thickness. Sheet membranes guarantee thickness and allow faster tiling, though they require careful seam overlaps and unmodified mortar. Installer skill matters more than the choice.
Can you combine two different waterproofing products?
Better to avoid it. Manufacturers test and warranty their products as complete systems. Mixing brands usually voids coverage on both sides, and any future failure leaves responsibility unclear. Pick one system and follow its manual completely.
How long does waterproofing need to dry before tiling?
Liquid membranes typically need 12 to 24 hours between coats and another 24 hours after the final coat. Sheet membranes allow tiling once the setting mortar reaches the initial set, usually the next day. Always follow the schedule printed on the product label.
How long does shower waterproofing last?
A correctly installed system commonly lasts 20 years or more. Lifespan depends on installation quality far more than material choice. Keeping silicone joints fresh at corners and at the base extends it further, since cracked caulk lets water sit against the membrane constantly.
Do I need a vapor barrier in a residential shower?
Usually not as a separate item. Standard home showers produce moisture levels a normal membrane handles well. Steam showers differ, because a steam generator creates far more water vapor and requires an assembly designed for that load.
Does the whole bathroom need waterproofing or just the shower?
The shower always needs it. Beyond that, the shower threshold transition, the tub flange area, and splash zones near sinks all benefit. Full floor waterproofing suits curbless showers, accessible layouts, and busy family bathrooms.
What happens if a shower is not waterproofed properly?
Moisture collects in the wall cavity, where mold can begin growing on damp surfaces within a couple of days. Over months, framing softens, subfloor weakens, and tile starts sounding hollow or coming loose. Repairs at that stage mean removing tile and rebuilding the assembly.
Planning a Bathroom Remodel in Redwood City?
Waterproofing disappears once tile goes up, so it deserves attention while walls are still open. We build every shower to California code, pull each San Mateo County permit, and send daily progress photos so you can see the work behind your tile.
Call (614) 926-0608 or book a free in home estimate for a fixed written quote within 24 hours.