
Waterproofing bathroom flooring means installing a continuous barrier under your tile so water never reaches the subfloor. Most homeowners learn this the hard way. The tile looked perfect for six years, then one corner lifted, grout cracked, and the wood underneath had been soaking the whole time. Getting this layer right costs very little during a remodel. Skipping it costs a great deal later.
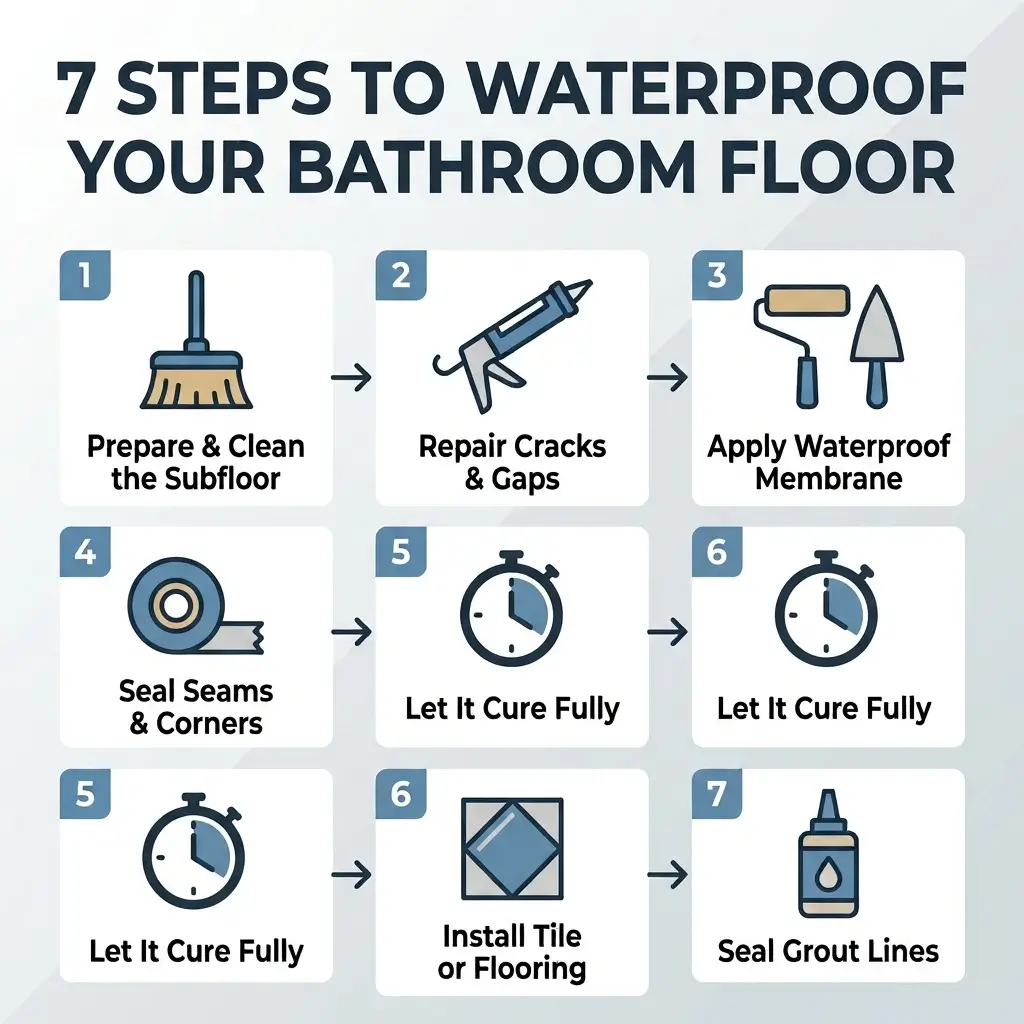
Waterproofing bathroom flooring takes seven steps: inspect and repair the subfloor, seal every penetration, reinforce corners, prime the substrate, apply two coats of membrane, flood test the floor, then finish the edges and grout. The whole job takes one to three days, and most of that is drying time.
Why Waterproofing Bathroom Flooring Matters More Than the Tile
Homeowners spend weeks choosing tile. Almost nobody thinks about the grey layer underneath. That layer decides whether your floor lasts twenty years or five.
Tile and Grout Are Not Waterproof
Porcelain tile absorbs very little water. Grout absorbs plenty. Every grout line pulls moisture down toward the substrate, and cement grout stays damp long after the surface looks dry. Bath mats make it worse by trapping water against the floor.
So a tile assembly slows water down. It does not stop water. Only a dedicated membrane does that.
Where Water Actually Gets In
Four places account for nearly all bathroom floor moisture: grout lines, the joint where floor meets wall, pipe openings such as the toilet flange, and the shower threshold. Each one gives water a slow path to the framing, where wood rot and mildew take hold quietly.
According to the U.S. Environmental Protection Agency, mold can begin growing on damp building materials within 24 to 48 hours. Once moisture sits under tile, it rarely dries on its own.
Before You Start: Know Your Subfloor
Your substrate decides which system to use. Check this first, because every step afterward depends on the answer.
Concrete Slab Floors
Slabs stay stable and carry almost no movement, which makes them ideal for liquid membranes. Concrete is porous though, so it pulls moisture out of your first coat. Primer becomes essential rather than optional here.
Many homes built before 1970 across Redwood City, San Carlos, and Belmont sit directly on slab. Moving a drain in one of these bathrooms means cutting and repouring concrete, so waterproofing around that new penetration matters even more. Our full bathroom remodel process includes a slab check before any quote is written.
Plywood or OSB Over Joists
Wood moves. It expands with humidity, contracts as it dries, and flexes when someone walks across it. That deflection cracks rigid tile assemblies over time.
Press down across the floor and feel for soft spots or bounce. Any give means the subfloor needs reinforcing before waterproofing begins. Wood substrates usually call for an uncoupling layer, not just a coating.
Second Story and Condo Bathrooms
Water that escapes an upstairs bathroom lands on someone’s ceiling. Stakes climb sharply here, and many condo associations require documented waterproofing before approving a project. Build these floors with a full membrane system and keep the paperwork.
Level Floor, Sloped Shower Pan
Two different rules apply in the same room. The main bathroom floor should sit level and flat, with no dips where water can pool. A shower pan is the opposite: it needs fall toward the drain, roughly one quarter inch of drop per foot, so water leaves instead of sitting on your membrane.
Curbless and zero threshold showers make this critical, since the pitch has to move water without a curb holding it back. Check your slope with a level before coating, because a membrane cannot fix a floor that drains the wrong way.
What Building Code Actually Requires
Here is the honest answer most guides avoid. Under the International Residential Code, waterproofing is required inside the shower enclosure. It generally is not required across the rest of the bathroom floor.
Full floor waterproofing is best practice, not law. We recommend it because the cost is small and the protection is real, but you deserve to know the difference between a requirement and a recommendation. The Tile Council of North America publishes the installation methods most tile setters follow for both.
Choosing Your Waterproofing System
Four systems dominate residential work. Each suits a different floor.
- Liquid membrane: A rollable coating that cures into flexible rubber. RedGard from Custom Building Products, Hydro Ban from Laticrete, and AquaDefense from Mapei all work this way. Best for slabs and cement board. Easiest for a first timer. Needs two coats.
- Sheet membrane: Bonded polyethylene set into thinset mortar, such as Schluter Kerdi. Best for complete new installs and shower systems. Delivers exact thickness with no guesswork, though seams demand care.
- Uncoupling mat: A dimpled mat letting the substrate move independently of the tile. Schluter Ditra is the common choice, and Ditra Heat adds radiant warmth in the same layer. Best over wood subfloors, and it pairs naturally with heated floors in a master bathroom remodel.
- Foam backer board: Rigid waterproof panels such as Wedi or GoBoard that replace cement board outright. Ready to tile immediately, no cure wait, highest material cost.
Concrete slab with no shower? Liquid membrane. Wood subfloor with flex? Uncoupling mat or foam board. Full shower build where floor and walls form one system? Sheet membrane, which is what our shower remodeling crews use most often.
Tools and Materials You Will Need
Gather everything before you open a bucket. Running out of primer mid coat leaves a seam you cannot feather back in smoothly.
Materials
- Liquid membrane, sheet membrane, or foam panels
- Waterproofing fabric mesh or fleece tape for corners
- 100 percent silicone caulk, neutral cure
- Floor primer for porous substrates
- Floor patching compound
- Cement backer board such as HardieBacker, Durock, or DensShield from Georgia Pacific
- Unmodified thinset mortar for sheet systems
- Penetrating grout sealer
Tools
- Shop vacuum and broom
- Half inch nap paint roller, tray, and brush
- Notched trowel for thinset, V notched or square notched
- Margin trowel and putty knife for embedding mesh
- Caulk gun
- Masking tape for clean wall lines
- Four foot level
- Utility knife and tape measure
Skip a vapor barrier under the membrane unless your product sheet calls for one. Doubling up can trap moisture between layers instead of blocking it.
Step 1: Inspect and Repair the Subfloor
Vacuum everything. Dust, adhesive residue, and loose grit all block adhesion, and a membrane bonded to dust is bonded to nothing.
Next, hunt for problems. Fill cracks wider than one eighth inch with patching compound and let it cure fully, usually a full day. Replace soft or stained plywood rather than coating over it. Confirm the floor sits flat, since low spots collect water and thick membrane both.
Step 2: Seal Every Penetration, Starting With the Toilet Flange
This step gets skipped constantly, and it causes more floor damage than any other single mistake.
Anywhere a pipe passes through your floor, water has a direct route to the framing. The toilet flange is the worst offender, because the wax ring seals the toilet to the flange, not the flange to the floor. Water from mopping or a slow leak runs straight down that gap.
Seal around the flange with 100 percent silicone before the membrane goes on, then carry your membrane right up to the flange edge. Treat supply lines and drain openings the same way. Tool each bead smooth and allow a full 24 hours to cure before coating over it.
Step 3: Reinforce Corners and Change of Plane Joints
Every place the floor meets a wall acts as a hinge. Structures settle, rooms warm and cool, and that joint opens and closes constantly. Plain coating cracks there first.
Cut fabric mesh or fleece tape to length. Brush a thin layer of membrane along the corner, press mesh firmly into the wet material with a margin trowel, and work out every bubble. Let it tack up for roughly 30 to 45 minutes. Treat any expansion joint in a slab the same way.
Reinforcement separates real waterproofing from painting the floor grey.
Step 4: Prime the Substrate
Bare concrete and cement board drink liquid membrane. Without primer, coat one soaks in instead of forming a film, leaving a thin porous layer where you expected a barrier.
Roll a compatible primer in one even pass, working from the far corner toward the door. Two to four hours of dry time is typical. Backer board and foam panels usually skip this step, so check the sheet for your specific membrane.
Step 5: Apply Two Coats to the Right Thickness
Pour membrane into a tray and roll it with a half inch nap roller, using a brush for tight spots. Carry the coating at least six inches up every wall. Work toward the door so you never paint yourself into a corner.
Let the coat dry completely. Liquid membranes usually change color as they cure, and that shift is your signal. Apply coat two perpendicular to the first, which fills pinholes the opening pass missed.
Two thin coats beat one thick coat every time. Rated performance typically needs a dry film thickness around 20 to 30 mils, and a single heavy application sags, traps air, and cures unevenly.
One warning for sheet systems: Schluter Systems requires unmodified thinset meeting ANSI A118.1 to set ceramic, porcelain, natural stone, and large format tile over Kerdi. Modified thinset needs air to cure, and sandwiched between impervious membrane and impervious tile, it may never harden properly. Wrong mortar voids the system warranty.
Step 6: Flood Test Before Any Tile Goes Down
Testing takes an afternoon. Guessing takes a demolition.
For a shower pan, plug the drain, dam the threshold, and fill with about an inch of water. Mark the water line, then wait 24 hours. A level that holds means your pan is sound. Any drop means water is escaping somewhere, and finding it now saves you the floor.
For the bathroom floor outside the shower, tape a square of plastic sheeting flat to the membrane and seal all four edges. Check the next morning. Condensation underneath means the membrane has not finished curing, so give it more time.
Step 7: Finish the Edges, Seal the Grout, Protect the Baseboards
Once tile is down and grout has cured, apply a penetrating grout sealer. Reapply every one to two years in a family bathroom.
Run 100 percent silicone, not grout, at every change of plane: floor to wall, tile to tub, and around the shower base. These joints move, and silicone flexes where grout cracks.
Finally, choose baseboards that tolerate moisture. PVC, tile, and sealed hardwood all hold up well. Seal the bottom edge with caulk so water cannot wick underneath.
Mistakes That Cause Waterproofing to Fail
Five errors account for nearly every failure we see:
- One thick coat instead of two thin ones: Heavy coats sag, trap air, and cure unevenly.
- Skipping primer on concrete: Slabs absorb your membrane and leave a porous film.
- Leaving corners unreinforced: Floor to wall joints flex and crack first, every time.
- Tiling before full cure: Tile weight compresses uncured membrane and displaces it.
- Coating over the green board: Moisture resistant drywall is not a waterproofing substrate. Use a cement board or foam panel behind wet areas.
What Waterproofing Bathroom Flooring Costs
Materials for a standard bathroom floor of roughly 50 to 80 square feet run about 50 to 120 dollars for a liquid membrane system. Sheet membranes and foam boards cost more, generally 80 to 200 dollars in materials for the same area.
Professional installation of the waterproofing layer alone typically runs several hundred dollars. Set against a full remodel budget, it ranks among the smallest line items on the invoice and protects everything else on it.
Compare that with a failed subfloor. Once water reaches framing, repair means removing tile, cutting out substrate, treating mold, and rebuilding from the joists up. Current project scopes and estimates are on our pricing page.
When to Hire a Licensed Contractor
Bring in a professional when:
- Your bathroom sits on a second story or inside a condo building
- You are building a curbless or zero threshold shower, which we handle as part of an accessible bathroom remodel
- The layout moves a drain in a slab foundation
- Existing subfloor shows soft spots, staining, or a musty smell
- Permits and inspections apply
We are a CSLB licensed contractor based in Redwood City, we pull every San Mateo County permit, and we build to Title 24 and CalGreen standards.
Frequently Asked Questions
Does tile waterproof a bathroom floor on its own?
No. Grout lines and floor to wall joints let water reach the substrate over time. A dedicated membrane beneath the tile protects the subfloor and framing.
Can I waterproof over existing tile without removing it?
Not effectively. Membranes bond to the substrate below a tile assembly, not on top of it. Surface sealers slow absorption but deliver far less protection.
How long does bathroom floor waterproofing last?
A correctly installed membrane lasts 10 to 20 years. Joints and corners wear first, so recaulking every five to seven years keeps the weak points sound.
Do I need to waterproof under vinyl plank flooring in a bathroom?
Yes, where it counts. Waterproof planks protect the plank surface, not the subfloor. Water reaching seams or the toilet base still soaks the wood below.
What is the best waterproofing product for a bathroom floor?
Liquid membranes such as RedGard and Hydro Ban suit slabs. Kerdi leads for full system installs. Ditra or a foam board like Wedi handles wood subfloors best.
How thick should the waterproofing membrane be?
Around 20 to 30 mils dry film thickness for most liquid products. Two full coats with a half inch nap roller usually achieve it. Follow the coverage rate on the product sheet.
Can I use a sheet membrane on the floor and a liquid membrane on the walls?
Physically yes, and installers do combine them. Manufacturer warranties generally cover complete systems only, so mixing types can leave you uncovered if something fails.
Getting the Layer Under Your Tile Right
Check your subfloor, pick the system that matches it, seal every penetration, reinforce the corners, apply two coats, and test before you tile. Waterproofing bathroom flooring rewards patience more than skill. Ready to start? Book a free in home estimate and we will inspect your subfloor before quoting a fixed price.